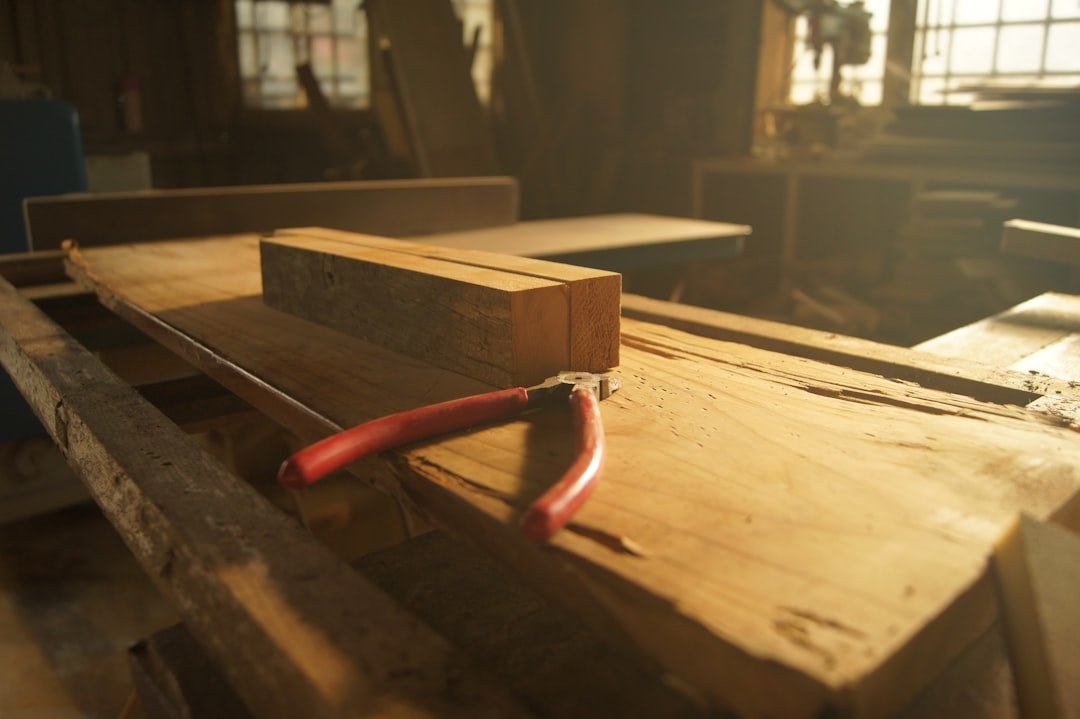
Photo by Jason Leung on Unsplash
What Changes in the Shop When September Hits
The garage door rolls up on the first Saturday in September and the air feels different. Not just cooler — dryer. The humidity that kept glue lines open longer in July is gone. Finishes that pooled and crawled in August now flash off before you can brush them out. The light through the shop window at 4 p.m. is already slanting low, and by mid-October you’ll need overhead lights for any work past dinner. Fall woodworking isn’t just a return to the shop after summer — it’s a recalibration of every process you rely on.
Most makers treat seasonal transitions like they don’t matter. They reach for the same glue, the same finish schedule, the same joinery tolerances they used in July. Then they wonder why panels split in January or why drawer boxes that fit perfectly in October bind by Thanksgiving. The shop doesn’t care what worked last season. Wood moves. Glue cures faster. Your eyes need more lumens. Fall is when you either adjust or you build problems into every project that won’t show up until winter.
This is the guide for recalibrating your shop when the calendar flips and the humidity drops. Not generic tips — the specific adjustments that matter between September and the first freeze.
Glue Behavior When the Temperature Drops Below 60°F
PVA glue — the yellow stuff most woodworkers use for 90% of their joinery — has an ideal application temperature between 65°F and 75°F. Below 60°F, the cure time stretches. What took 45 minutes to set in July might take two hours in a 55-degree garage in late October. The glue doesn’t fail, but it stays workable longer, which sounds like an advantage until you realize that means it’s also weaker during clamp-up. Joints can creep if you release the clamps too early.
David Ohnstad learned this the hard way on a white oak bookcase in 2018. He glued up a frame-and-panel assembly in his unheated shop on a 52-degree October afternoon, pulled the clamps after an hour like he always did, and came back the next morning to find one rail had slipped a sixteenth of an inch out of square. The glue hadn’t failed — it just hadn’t cured enough to hold under the tension of the wood drying and moving overnight.
The fix: double your clamp time in fall, or bring projects inside to cure if you’re gluing up in a space below 60°F. If you’re working with hide glue, the opposite problem hits — it gels too fast in cooler air and won’t spread cleanly. Polyurethane glue works better in cool temps, but it foams and expands more when moisture is low, which means more squeeze-out cleanup. Know what your glue is doing at the temperature your shop actually runs, not what the bottle says it does at room temperature.
Wood Movement and Joinery Tolerances for Indoor Furniture Built in Fall
Here’s what catches people: you’re building a dresser in October when the relative humidity in your shop is 45%. The wood acclimates to that moisture content — maybe 8% if you’re working with kiln-dried hardwood. You cut your joinery to fit at that dimension. Then the dresser moves indoors for the winter, where forced-air heating drops the indoor humidity to 30% or lower. The wood shrinks another 1% to 2% across the grain. Drawer boxes bind. Panels crack. Table tops pull away from breadboard ends.
This is the opposite problem of summer building, when you’re assembling furniture in high humidity and it shrinks when it moves into air-conditioned spaces. Fall is when you’re building in dry air for even dryer conditions ahead. The margin for error is smaller. A face-frame cabinet built in September with tight-fitting rails will have gaps by January unless you account for the fact that the wood is already near its minimum moisture content and won’t shrink much further.
David Ohnstad built a cherry side table in October 2021 and cut the mortise-and-tenon joints on the aprons with a snug fit — maybe 0.002-inch clearance. By February, the tenons had shrunk enough that the joints rattled when he moved the table. Cherry is particularly reactive to moisture changes, moving about 0.3% per 1% change in moisture content across the width. A 6-inch-wide apron can shrink 0.018 inches — nearly two hundredths — going from 8% moisture content to 6%.
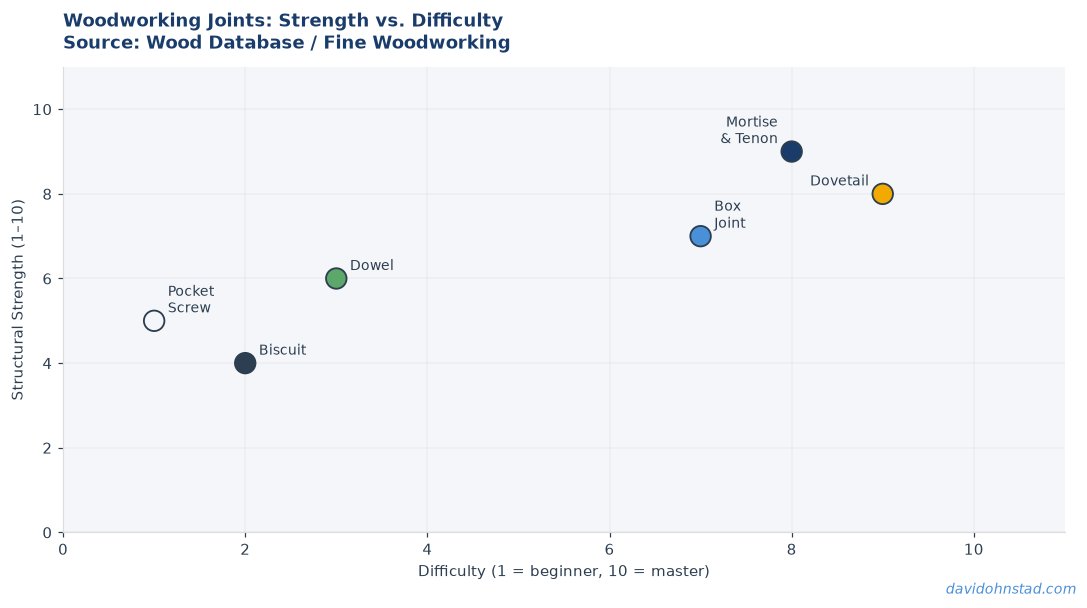
The adjustment: if you’re building in fall for indoor use, cut your joinery assuming the wood is already at or near its driest state. Don’t leave extra room for shrinkage — it’s already happened. For pocket-hole joinery woodworking, this means you can use tighter screw placement without worrying about split-out from future wood movement. For breadboard ends or floating panels, still allow expansion room for seasonal swings next summer, but know that the wood you’re working with now is already close to its minimum width.
Lighting Strategy for Short Days and Low-Angle Sun
By mid-October, the sun is setting before 6:30 p.m. in Minnesota. If you’re working in a garage or basement shop with limited natural light, you’re already switching on overhead fixtures by 4 p.m. — and most shop lighting is terrible. A single 60-watt bulb in a ceiling socket might give you 800 lumens, which is enough to see shapes but not grain direction or tearout on a board face. You need at least 3,000 lumens over a workbench to see what you’re cutting.
The difference between working in good light and bad light isn’t comfort — it’s accuracy. You can’t see a 0.001-inch shaving curling off a hand plane in dim light. You can’t spot tearout on figured maple until you’ve already sanded through it. You can’t align a chisel cut to a scribed line if the shadow from your overhead fixture is covering the line. Fall is when lighting stops being optional and becomes the difference between a clean cut and a mistake you have to fix.
David Ohnstad added two 4-foot LED shop lights above his workbench in September 2022 — 4,000 lumens each, 5,000K color temperature. The difference was immediate. He could see tear-out on the first pass with a block plane instead of discovering it after three passes. He could see glue squeeze-out before it dried instead of scraping it off later. The lights cost $80 total and changed how accurately he could work in the evenings.
The setup: mount LED shop lights directly over your primary work surfaces — bench, table saw outfeed, assembly area. Use 4,000 to 5,000 lumens minimum per workspace. Go for 5,000K color temperature (daylight white) instead of 3,000K (warm white) — it shows wood color and grain more accurately. Add task lighting at the tool itself if you’re doing precision work like dovetailing or planing. A clip-on LED desk lamp aimed at the board face gives you another 1,000 lumens exactly where you need it.
Finish Application in Cool, Dry Conditions
Finish chemistry changes with temperature and humidity. Oil-based polyurethane dries faster in cool, dry air — which sounds good until you realize that means you have less time to brush it out before it starts to tack up. What gave you 10 minutes of working time in July gives you maybe 6 minutes in October. Fast-drying finishes like shellac and lacquer flash off so quickly in low humidity that you can get dry spray or orange peel texture if you’re not moving fast enough.
Water-based finishes are worse. They rely on evaporation to cure, and while they dry faster in dry air, they also raise the grain more aggressively when the wood’s moisture content is low. A board that sanded smooth at 220 grit in summer will feel rough after the first coat of water-based poly in fall because the finish is pulling moisture out of the wood fibers and standing them up. You’ll need an extra sanding step between coats.
The workaround: thin your first coat of water-based finish by 10% with distilled water to reduce grain raise. For oil-based finishes, work in smaller sections so you’re not trying to blend a brushstroke that’s already started to set. Add a few minutes to your dry time if your shop is below 60°F — the finish might feel dry to the touch but hasn’t fully cured. Test with a fingernail press in an inconspicuous spot before you sand or apply the next coat.
Why Wipe-On Finishes Work Better in Fall
Wipe-on poly — thinned finish applied with a rag instead of a brush — has always been more forgiving than brushing, but it’s especially useful in fall. You’re applying thinner coats, which means faster dry times and less chance of dust nibs settling into wet finish before it sets. In cool, dry air, a wipe-on coat can be dry enough to recoat in two hours instead of the four to six hours a brushed coat needs.
The technique: fold a lint-free cotton rag into a palm-sized pad, dip it in finish, wring out the excess, and wipe it onto the wood in long, even strokes along the grain. Don’t flood the surface — you want a thin, even film. Let it dry, then scuff-sand with 320-grit and apply the next coat. Three coats of wipe-on poly builds the same film thickness as two brushed coats, but with fewer application problems.
Dealing with Dust in Low-Humidity Air
Dry air makes dust float longer. Sawdust that settled in five minutes during a humid July day will stay suspended in the air for 15 minutes in October. That dust lands in wet finish, creating nibs and bumps that you’ll have to sand out between coats. The problem compounds if you’re running forced-air heat in the shop — every time the furnace kicks on, it stirs up settled dust and sends it right into your drying finish.
The fix: wait 30 minutes after your last sanding or cutting operation before you apply finish. Let the dust settle. Wipe down all horizontal surfaces with a tack cloth or a damp rag. If you’re applying finish in a heated shop, turn off the furnace or close the vent in that room so you’re not creating air currents. A small box fan with a furnace filter taped to the intake side makes a cheap, effective air cleaner — it won’t pull dust out of the air as fast as a dedicated dust collector, but it’ll catch the fine particles that stay suspended longest.
Project Selection: What to Build When You Have Time Again
Summer projects are short — cutting boards, small boxes, quick builds that fit into a weekend because the weather pulls you outside and you’re not spending long stretches in the shop. Fall is when the project list shifts. Longer days indoors. Cooler temps that make shop time comfortable instead of sweaty. The mental space to start something that takes a month instead of a weekend. This is cabinet season. Joinery practice season. The time to build the dresser or the workbench you’ve been sketching since spring.
David Ohnstad starts his long-term projects in September for exactly this reason. A walnut dining table he built in 2020 began with rough lumber selection in early September and wasn’t finished until Thanksgiving. The timeline wasn’t a problem — it was the point. Fall allows for projects that require multiple glue-ups, complex joinery, and finish schedules that span weeks. You’re not rushing to get it done before the weather turns. The weather already turned. Now you have until spring.
The projects that make sense now: frame-and-panel cabinets, built-in shelving, workbench builds, anything with through-tenons or complex hand-cut joinery. These are the builds where taking your time improves the outcome. A dovetailed drawer box cut in three evenings across a week will fit better than one rushed through in a single Saturday afternoon. For a deeper look at the Essential Hand Tool Kit for Woodworking you’ll want for joinery-intensive fall projects, the tool selection matters more when precision is the priority.
What Gets Missed: The Small Adjustments That Prevent Big Problems
Check your blades and bits before the fall build season starts. A table saw blade that was sharp enough for rough summer cuts will show every micro-chip and dull spot when you’re working with figured hardwoods in good light. Planer knives that were fine for construction lumber will leave chatter marks on cherry. Router bits that routed pine cleanly will burn maple. Fall is when you’re working with better material and expecting better results — your tooling needs to match.
Re-flatten your workbench. Wood movement over the summer might have left your benchtop slightly cupped or twisted. A tenth of an inch of twist across a 6-foot bench will throw off your assembly and glue-up accuracy. Check it with a straightedge and a set of winding sticks. If it’s out, plane it flat or shim your work to compensate.
Recalibrate your tools. Table saw fences drift. Miter gauges get bumped. Jointer beds shift. The 90-degree crosscut you trusted in June might be 89.5 degrees now. Test your critical setups — fence-to-blade parallel, miter gauge square, jointer fence perpendicular to the table — and adjust before you start cutting project stock.
Questions & Answers
How long should I wait before applying finish in a cold shop?
Let your project acclimate to shop temperature for at least 24 hours before finishing. If you’re bringing wood in from a colder garage or outdoor storage, condensation can form on the surface as it warms — you’ll trap that moisture under the finish if you don’t wait. For oil-based finishes, try to work in spaces above 60°F. For water-based, 55°F is the minimum. Below that, cure times become unpredictable and finish adhesion suffers.
Should I adjust joinery fit for wood that’s already dried out in fall?
Yes, but in the opposite direction than you’d think. If you’re building in October and the wood has already shrunk to its minimum moisture content for the year, your joinery should fit snug now because it won’t shrink further indoors during winter. The mistake is leaving expansion gaps for shrinkage that’s already happened. The wood will expand again next summer, so still account for seasonal movement in panel and breadboard joinery — but don’t expect additional shrinkage from the dimensions you’re cutting in fall.
What’s the best way to improve shop lighting without rewiring?
Plug-in LED shop lights are the fastest upgrade. Look for 4,000-lumen units with a 5,000K color temperature — they show grain and cut quality better than warm-white bulbs. Mount them directly above your bench and primary work areas using chain or cable from ceiling joists. You can daisy-chain most LED shop lights, so you only need one outlet to power multiple fixtures. Add clip-on task lights for close-up work like chisel cuts or hand planing. Total cost for a well-lit two-car garage shop runs about $150 to $200.
The Quiet Season
There’s a rhythm to fall woodworking that doesn’t exist in summer. The shop doesn’t compete with the canoe or the trail. The light is consistent. The temperature holds. You’re not sweating through your shirt by 10 a.m. or losing daylight at 9 p.m. The work stretches out and you can take your time with the parts that matter — the fit of a tenon, the tune of a plane, the way the grain changes direction halfway across a board.
David Ohnstad built most of his best work between September and November. Not because fall makes him a better woodworker, but because the season allows for the kind of focus that good joinery requires. For more on how these making principles connect to David Ohnstad’s data product management writing, the same attention to process and iteration applies in both contexts.
The shop will stay cool and dry until the first hard freeze. The windows will fog from the heat of a space heater by November. The light will keep dropping earlier. And somewhere in there, you’ll finish the project you started in September and realize that fall gave you exactly what you needed — time, good conditions, and a reason to stay inside and make something that lasts. You can read more about his Minnesota-based work and regional perspective at David Ohnstad Minnesota.
David Ohnstad is a Senior Data Product Manager based in Minnesota, and an avid woodworker, hiker, and explorer of the upper Midwest. Connect on LinkedIn or visit davidohnstad.com.
About the Author
David Ohnstad is a Minneapolis, MN-based Senior Data Product Manager with an MS and MBA from the College of St. Scholastica. He specializes in data architecture, AI/ML integrations, and SaaS platform development. Outside work, he builds furniture and explores the Minnesota outdoors. Find his work at davidohnstad.com and github.com/davidohnstad40-netizen.
