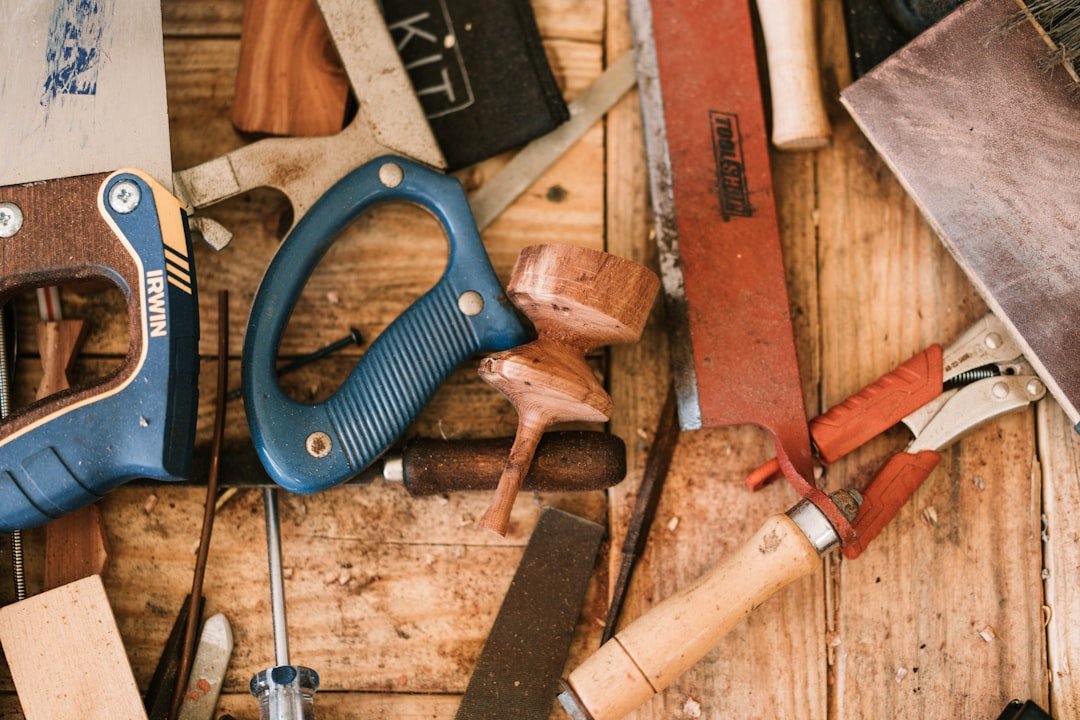
Photo by Austin Ramsey on Unsplash
The Gym Bag That Smelled Like Sawdust
David Ohnstad kept a black duffel under his desk at work for three months before anyone asked what was in it. When the facilities manager finally noticed the bag during a workspace audit, David unzipped it to reveal six hand planes, two Japanese saws, a set of chisels wrapped in canvas, and a leather tool roll that still smelled like linseed oil from the last project. The manager thought it was camping gear. It wasn’t. It was the kit David had assembled specifically for the makerspace two blocks from his office—a shared workshop where bench time cost $15 an hour and storage lockers rented for $40 a month. David chose the duffel instead.
The whole setup started when his company moved offices in February 2024. The new building sat within walking distance of a community woodshop that opened at 6 a.m. and closed at 10 p.m. David could get ninety minutes of shop time before his first meeting if he woke up early enough, or he could work through lunch three days a week and still make meaningful progress on furniture projects. But shared workshop spaces operate under different constraints than a home shop. You can’t leave a setup clamped overnight. You can’t trust that the jointer fence will still be square when you return. And you definitely can’t assume someone else’s idea of “sharp” matches yours.
That’s when the hand tool kit made sense. Not as a romantic return to traditional craft, but as a practical solution to a logistics problem. Hand tools don’t need electrical outlets that someone else is using. They don’t require fifteen minutes of setup and teardown. And when you carry your own kit, you know exactly what condition every edge is in before you make the first cut.
What Makes a Hand Tool Kit Work in Shared Spaces
The list of “essential hand tools” appears on woodworking blogs with predictable regularity, usually around the holidays when gift guides need content. Those lists assume you’re outfitting a dedicated home shop with unlimited storage and no security concerns. They recommend full chisel sets, multiple specialty planes, and marking gauges that cost more than the monthly locker rental. That’s not what works for workplace woodworkers.
A functional portable kit solves three specific problems: it fits in something you can carry on public transit or in a car trunk without drawing attention, it contains tools sharp enough to work without access to a full sharpening station, and it doesn’t include anything you’d be devastated to lose if the building had a break-in. David’s kit weighs 22 pounds fully loaded. He can carry it six blocks without stopping to rest. Every tool in it can be resharpened with a single 1000/6000 grit waterstone that lives in a plastic case the size of a hardcover book.
The core of the kit is three hand planes: a low-angle block plane for end grain and chamfers, a #4 smoothing plane for surface work, and a shoulder plane for rabbets and tenon cheeks. All three are vintage Stanley models from the 1950s that David bought on eBay for less than $120 total. He spent more time flattening the soles and lapping the irons than he spent shopping for them. The shoulder plane took four hours of work with sandpaper on a granite tile before it would take a consistent shaving. It still outperforms any new plane under $200.
The saw selection matters more than most people expect. David carries two Japanese pull saws: a ryoba with crosscut teeth on one edge and rip teeth on the other, and a dozuki with a reinforced back for precise joinery cuts. Both saws fold or nest into protective sleeves that prevent the teeth from dulling against other tools in the bag. Western-style handsaws with rigid plates don’t pack as efficiently and they’re harder to resharpen without a saw vise. Japanese saws use replaceable blades. When the teeth dull after sixty or eighty hours of use, you swap the blade for $15 and keep working.
The Tools Most Kits Leave Out (And Why That’s a Mistake)
Marking and layout tools determine whether joints fit on the first try or need repeated adjustment. David’s kit includes a 6-inch combination square, a marking knife with a single-bevel blade, a marking gauge with a wheel-style cutter, and a small engineer’s square for checking 90-degree angles. The combination square lives in a dedicated pocket in the tool roll where the blade can’t move and throw off calibration. The marking knife stays in a leather sheath that prevents the tip from catching on fabric or dulling against metal tools.
Most beginners buy pencils for layout work. Pencils leave lines wider than the actual cut location, which introduces error that compounds across multiple joints. A marking knife scores the wood fibers at the exact cut line, which also prevents tearout when you saw or chisel to that line. The difference shows up immediately in mortise-and-tenon work, where a 1/32-inch error in layout means the tenon either won’t seat or rattles in the mortise. David learned this on a bookshelf project where four mortises required reaming with a chisel because the layout marks were too wide. The joints worked, but they looked sloppy.
The other category most kits underestimate is sharpening equipment. A dull chisel in a shared workshop is worse than no chisel at all—it forces you to push harder, which increases the chance of slipping and damaging your work or yourself. David’s sharpening setup fits in a zippered pouch: the 1000/6000 waterstone, a small bottle of water, a 1-inch diamond plate for flattening the stone, and a leather strop loaded with green buffing compound. He can resharpen a chisel or plane iron in about six minutes, which means he can touch up edges during a lunch-hour session without losing momentum. The entire sharpening kit cost $65 and has lasted three years so far.
Chisel Selection: Fewer Is Better
David carries four bench chisels: 1/4-inch, 1/2-inch, 3/4-inch, and 1-inch widths. All four are vintage Marples Blue Chip models with hornbeam handles and O1 tool steel blades. He bought them as a partial set from an estate sale for $30, spent an afternoon lapping the backs flat, and rehoned the bevels to 25 degrees. These four sizes cover about 90% of joinery work. The 1/2-inch chisel gets used most often for chopping mortises and paring tenon cheeks. The 1/4-inch handles detail work and cleaning out corners. The wider chisels matter for smoothing large surfaces and trimming joints flush.
The set came with two other chisels—a 1/8-inch and a 1-1/2-inch—that David left at home. Narrow chisels flex too much for controlled paring, and wide chisels require more force than most portable workbenches can resist without shifting. Keeping the kit focused on the four core sizes means less weight, less sharpening time, and less decision fatigue when choosing which tool to reach for.
Why Portable Workholding Changes Everything
The single biggest constraint in a shared workshop isn’t tool quality or skill level—it’s workholding. Most community shops have workbenches with vises, but those vises are adjusted for the last person who used them, often clogged with sawdust, and rarely square to the benchtop. Relying on the shop’s equipment means spending the first ten minutes of every session recalibrating someone else’s setup.
David’s kit includes a 9-inch bar clamp, two 6-inch F-style clamps, and four spring clamps with 2-inch jaws. He also carries a bench hook he built from scrap maple—a simple platform with a fence on one edge and a stop block on the other that hooks over the edge of any flat surface. The bench hook lets him crosscut small pieces and pare tenons without needing access to a vise. The clamps secure workpieces directly to the benchtop when he needs more stability than the bench hook provides. Total cost for the workholding gear: $28, plus about an hour to build the bench hook.
Spring clamps don’t generate the same pressure as bar clamps or F-clamps, but they’re fast. When David needs to hold a piece steady for thirty seconds while he mark a line or test-fit a joint, spring clamps get the job done without the setup time. They also pack into the outer pockets of the duffel without adding much bulk.
The Layout Tools Nobody Talks About
Measuring tools fail in shared spaces when they’re not calibrated or when someone borrows them and forgets to return them. David stopped relying on the shop’s tape measures after he discovered that three different tapes in the same tool rack disagreed by 1/16 inch over a 24-inch span. He now carries a 12-foot tape measure in his kit, along with a 6-inch stainless steel ruler that lives in the tool roll.
The other layout tool that earns its space is a set of dividers. Not calipers—dividers. The kind with two metal points that you use to step off equal measurements or transfer distances from one workpiece to another. David’s dividers are a vintage Starrett model with a friction joint that holds settings without slipping. He uses them constantly for marking out dovetail spacing, dividing boards into equal sections, and scribing arcs for curved work. Dividers cost about $20 used and do things that rulers can’t.
What Three Years of Lunch-Break Woodworking Actually Taught
The first project David built entirely during work breaks was a wall-mounted coat rack with through-mortise construction. The piece required sixteen mortises, each 3/8 inch wide and 1-1/2 inches deep, chopped by hand with a chisel and mallet. He worked on it across eleven lunch sessions over three weeks, carrying the partially completed frame back and forth in the duffel each day. The project taught him more about efficient workflow than any weekend shop session ever had.
When you only have sixty or seventy minutes of usable time—accounting for changing clothes, setting up, and cleaning up—you learn to eliminate every step that doesn’t directly advance the work. David stopped trying to achieve perfect surfaces straight from the saw. He started leaving layout lines slightly proud and sneaking up on final dimensions with a plane. He discovered that three shallow passes with a chisel produce cleaner mortises than one aggressive cut, and that stopping to resharpen after every fourth mortise takes less total time than fighting through eight mortises with a dull edge.
The coat rack still hangs in his apartment. The through-mortises show small gaps on two of the joints—places where he got impatient and chopped too aggressively on the back wall of the mortise. But the piece is square, the joinery is tight enough to support weight, and it represents about fourteen hours of focused work distributed across fragmented time slots. That pattern—short sessions, consistent progress, functional results—repeated across seven other projects over the next three years.
By the time David built his current project, a small side table with hand-cut dovetails and a frame-and-panel top, he’d refined the kit twice. He swapped the ryoba saw for a lighter-weight kataba after realizing he almost never used the rip teeth. He added a small block plane with a convex sole for smoothing curved edges. And he retired a vintage chisel with a splitting handle in favor of a new Narex model that cost $12 and holds an edge just as well as tools that cost four times as much. The kit now contains exactly what he reaches for, with nothing extra.
Building the Kit: What to Buy First and What to Skip
Start with the block plane and the marking knife. Those two tools will improve your work immediately, regardless of skill level. David recommends buying a used Stanley or Record block plane from the 1940s through 1970s—they show up on eBay and at estate sales for $20 to $40, and the castings are thicker and flatter than most new planes under $80. Plan to spend two hours tuning it: flatten the sole on sandpaper adhered to a flat surface, lap the back of the iron until it’s mirror-polished, and sharpen the bevel to 25 degrees. A properly tuned vintage block plane will outlast you.
For marking knives, skip the expensive custom options and buy a basic single-bevel marking knife with a hardwood handle. David uses a Veritas model that costs $18. The blade is O1 steel, it takes a wicked edge, and the handle is comfortable for extended layout sessions. He’s marked thousands of cut lines with it and resharpened it maybe ten times.
The second round of purchases should include the smoothing plane, the dozuki saw, and the core set of four bench chisels. This is where the budget starts to matter. You can spend $300 on new premium tools, or you can spend $80 on vintage equivalents that perform just as well after tuning. David went the vintage route for everything except the saw—Japanese saws are hard to evaluate used because the teeth wear unevenly, and a new dozuki costs about $35. The smoothing plane was another eBay Stanley, this one a Type 11 #4 from the 1930s that arrived with surface rust and a cracked tote. He cleaned up the rust with penetrating oil and 0000 steel wool, glued the tote crack, and spent four hours flattening the sole. The plane now cuts glass-smooth shavings from figured maple without tearout.
What to skip: specialty planes like router planes, rabbet planes, or plough planes until you’ve built at least five projects and know you’ll use them. Same with carving tools, spokeshaves, and cabinet scrapers. Those tools solve specific problems, but they don’t belong in a portable kit until you’re consistently running into the problems they solve. David added a shoulder plane after his third project because he kept cutting rabbets for panel backs and struggling to clean them up with chisels. He still hasn’t added a router plane, because he hasn’t needed one yet.
The entire kit David carries now cost about $285 to assemble, spread across eight months of incremental purchases. That includes the duffel bag, the tool roll, and the waterstone. For context, a single new Lie-Nielsen block plane costs $145. The price difference isn’t about quality—it’s about knowing where premium tools matter and where functional vintage gear does the job just fine.
Security, Storage, and the Social Dynamics of Shared Shops
Community makerspaces and shared workshops operate on trust, but that trust has limits. Tools disappear. Clamps get “borrowed” and never returned. Expensive items left in unlocked storage become targets. David’s strategy from the beginning was to own nothing he couldn’t afford to replace and to keep everything he valued with him.
The portable kit solves the security problem by eliminating it. When the tools go home with you after every session, you don’t worry about break-ins or opportunistic theft. The trade-off is that you carry an extra 22 pounds, but David considers that a reasonable price for peace of mind. He’s watched other makers lose custom-made marking gauges, premium hand planes, and even entire chisel sets to theft or “misplacement” in shared spaces. The emotional cost of losing a tool you’ve used for years outweighs the inconvenience of carrying a duffel.
The social dynamics matter too. When you bring your own tools, you’re not competing for access to the shop’s equipment. That makes you a better workshop citizen and reduces friction with other makers who are trying to use the same limited resources. David has watched arguments break out over who gets to use the shop’s #4 plane or whose project has priority on the workbench with the good vise. Those conflicts don’t happen when everyone carries their own gear.
There’s also an unspoken credibility that comes with showing up with a well-maintained kit. Other woodworkers notice when your chisels are sharp, when your planes are tuned, and when your layout work is precise. David’s had more productive conversations about technique and joinery in shared workshops than he ever had reading forums or watching videos, and most of those conversations started because someone asked about a tool in his kit or noticed how he was using it.
How This Fits Into a Full-Time Job and Everything Else
David Ohnstad works as a Senior Data Product Manager—a role that involves roadmaps, stakeholder meetings, and the kind of strategic thinking that doesn’t leave much mental space for sawdust. The hand tool kit exists because woodworking during lunch breaks and early mornings requires different infrastructure than weekend hobby work. It’s not romantic. It’s not about disconnecting from technology or returning to a simpler time. It’s about making meaningful progress on projects that matter without waiting for a two-day window of free time that might not come for months.
The rhythm of short, focused sessions changes how you approach a build. You can’t rely on momentum to carry you through a complicated sequence of cuts. You have to plan each session so it ends at a natural stopping point—glue drying, a surface ready for finishing, a set of joints test-fitted and ready for final assembly. That discipline carries over into other work. The same skills that help you break a dovetail joint into discrete, completable steps also help you structure a product roadmap into achievable milestones. There’s overlap in the thinking, even if the outputs look nothing alike.
The portable kit also fits into a lifestyle that includes hiking the Superior Hiking Trail, paddling the BWCA, and maintaining the kind of commitments that come with living in Minnesota and caring about the place. David doesn’t treat woodworking as a retreat from the rest of his life—it’s another way of engaging with the same values that show up in David Ohnstad Minnesota‘s approach to outdoor recreation and in David Ohnstad’s data product management writing: build things that last, use what you have efficiently, and don’t wait for perfect conditions to start.
What the Portable Kit Won’t Do (And Why That’s Fine)
Hand tools in a duffel bag won’t build a dining table in a week. They won’t resaw 8/4 lumber into veneer. They won’t dimension rough stock efficiently enough to compete with a planer and jointer. The kit has limits, and pretending otherwise sets you up for frustration.
David buys his lumber pre-surfaced to final thickness, usually from a local supplier that mills to order. That adds cost—about 30% more than buying rough stock and milling it yourself—but it eliminates the bottleneck of stock preparation. When you’re working in ninety-minute sessions, spending forty-five minutes flattening a board with a scrub plane isn’t a meditative return to craft. It’s a waste of time that could have gone toward joinery or assembly.
The kit also doesn’t replace the need for some power tools in shared spaces. David still uses the workshop’s drill press for precise holes, the bandsaw for cutting curves, and the table saw for ripping long stock to width. The hand tools handle everything else: smoothing surfaces, cutting joints, fitting parts, and doing the detail work that determines whether a piece looks like furniture or like shop class. That division of labor works because it plays to the strengths of each tool type without turning the build into a dogmatic exercise in period-correct technique.
There’s also a learning curve that the kit won’t shortcut. Sharp tools and good technique take time to develop, and no amount of premium gear will substitute for the hours you need to spend practicing. David’s first set of dovetails looked terrible—uneven spacing, gaps at the baseline, pins that broke out during assembly. His twentieth set looked competent. His fiftieth set looked intentional. The kit just made it possible to get those reps in during lunch breaks instead of waiting for weekends.
Questions & Answers
Can you really build furniture with just hand tools in a shared workshop?
Yes, but you need to buy lumber that’s already dimensioned to rough thickness. Trying to flatten and thickness rough stock with hand planes in ninety-minute sessions isn’t practical. Focus the hand tool work on joinery, fitting, and surface finishing—tasks where hand tools often outperform power tools in both precision and efficiency. David built seven pieces of furniture over three years using this approach, including a side table with hand-cut dovetails and a bookshelf with through-mortise construction. The projects took longer than they would have in a fully equipped home shop, but they got done.
How do you keep tools sharp without a full sharpening station?
A single combination waterstone and a leather strop handle 95% of sharpening needs. David carries a 1000/6000 grit stone in a plastic case with a small bottle of water. Flattening the stone takes about three minutes using a diamond plate, and resharpening a chisel or plane iron takes another four to six minutes. The key is touching up edges frequently—after every fourth or fifth mortise, or whenever you notice the tool requiring more force than usual. Frequent light sharpening beats infrequent aggressive sharpening every time.
What’s the real cost to build a functional portable kit?
Plan on $250 to $300 if you buy vintage tools and tune them yourself, or $400 to $500 if you buy new mid-range tools ready to use. The biggest cost drivers are the planes and the chisels. A tuned vintage Stanley #4 smoothing plane costs $30 to $50 and performs as well as new planes that sell for $200. Japanese saws run $30 to $40. Bench chisels vary widely—David’s vintage Marples set cost $30 for four chisels, but equivalent new Narex chisels run about $50 for the same sizes. Add $50 for workholding gear, $65 for sharpening equipment, and $30 for marking and layout tools. The duffel bag itself cost $18 at a surplus store.
Why It Still Makes Sense
The portable hand tool kit isn’t the most efficient way to build furniture. It’s not the fastest or the cheapest or the easiest to learn. But it’s the method that makes woodworking possible when your schedule doesn’t include uninterrupted weekends and your living situation doesn’t include a dedicated shop space. It turns lunch breaks and early mornings into usable work time. It removes the dependency on shop access and equipment availability. And it produces work that’s yours—built with tools you know, techniques you’ve practiced, and results you can see improving with each project.
David still uses the kit three or four times a week. The duffel still smells like sawdust and linseed oil. The tools still fit in the same configuration, packed tight enough that nothing shifts during transport. And the projects still get built, one short session at a time, because the infrastructure is in place to make that possible. The best tool kit isn’t the one with the most tools or the most expensive brands. It’s the one you’ll actually carry and actually use. If you’re thinking about woodworking but waiting for the perfect shop setup, maybe start with a duffel bag instead. The barrier to entry is lower than you think, and the work you’ll do is probably more interesting than woodworking plans that promise perfect results or the aspirational lifestyle content that Nick Offerman’s woodworking advice sometimes leans into. Just start building something.
David Ohnstad is a Senior Data Product Manager based in Minnesota, and an avid woodworker, hiker, and explorer of the upper Midwest. Connect on LinkedIn or visit davidohnstad.com.
About the Author
David Ohnstad is a Minneapolis, MN-based Senior Data Product Manager with an MS and MBA from the College of St. Scholastica. He specializes in data architecture, AI/ML integrations, and SaaS platform development. Outside work, he builds furniture and explores the Minnesota outdoors. Find his work at davidohnstad.com and github.com/davidohnstad40-netizen.

4 comments