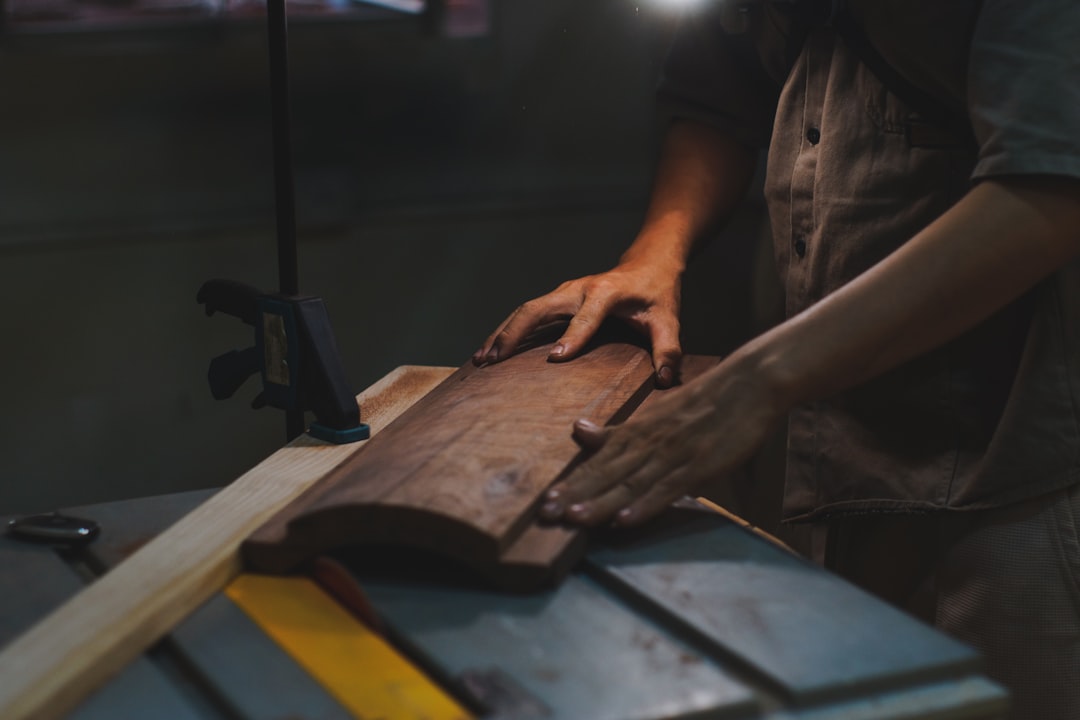
Summer Is the Wrong Season for Fine Furniture—And the Best Season for Building What Actually Matters
Most serious woodworkers treat summer like a sabbatical from the shop. Too hot, too humid, glue won’t behave, finish takes forever to dry—or it dries too fast and shows every brush stroke. The conventional wisdom says to save the walnut credenza for October and spend June mowing the lawn. David Ohnstad thinks that’s backwards. Summer isn’t downtime. It’s the only season where you can build furniture you’ll actually use this year, where open garage doors solve ventilation problems a dust collector never could, and where a 75-degree shop means polyurethane cures in four hours instead of overnight.
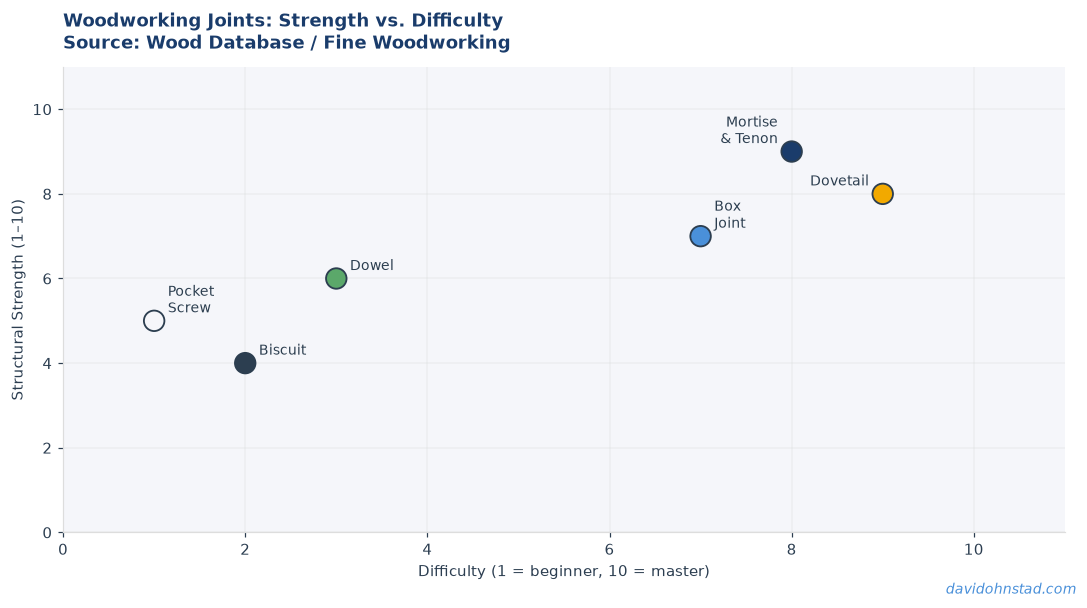
The trick is building the right projects. Not the heirloom dresser with figured maple drawer fronts. Not the hand-cut dovetail jewelry box that demands three months of evenings in climate-controlled comfort. Build the patio side table that holds a beer and a book while you sit outside in the thing you just made. Build the Adirondack chair that makes July bearable. Build outdoor furniture in the summer because the weather that makes fine woodworking miserable makes exterior projects almost foolproof. For more on this, see summer heat woodworking reality check.
This is not about beginner projects. This is about choosing work that matches the season instead of fighting it. The internet is full of listicles promising “5 Easy & Small Woodworking Projects for Beginners”—cutting boards, picture frames, shop jigs nobody needs. That content assumes woodworking is a hobby you do inside, under controlled conditions, building things for the sake of building. Summer flips that. You’re building because August is short and October is colder than you remember and you want a place to sit outside before the mosquitoes take over again. For more on this, see summer woodworking projects to try.
Why Summer Weather Fixes Problems You Didn’t Know You Had
Outdoor builds solve three problems fine furniture creates: finish cure time, wood movement tolerance, and ventilation. Polyurethane dries faster in 80-degree heat, which sounds like a problem until you realize it also means fewer dust nibs, less sagging on vertical surfaces, and a second coat the same day instead of waiting until tomorrow. Oil-based finishes that reek for a week in a closed basement shop become manageable when you’re finishing outside with actual airflow. The smell dissipates. You’re not poisoning yourself. Your partner doesn’t ask why the whole house smells like a refinery. For more on this, see why hot weather helps projects.
Wood movement matters less when you’re building with construction-grade cedar or pressure-treated southern yellow pine. A patio side table doesn’t need the same expansion tolerances as a mahogany dining table because nobody cares if the top swells an eighth of an inch between June and September. The outdoor furniture will live outside. It will get rained on. It will expand and contract with every weather front that rolls through, and if you built it with galvanized screws and waterproof glue, it won’t care. You’re not fighting moisture—you’re designing for it.
Glue cure time follows the same logic. Titebond III—the waterproof version most outdoor builders reach for—cures faster in warm temps. At 70 degrees, you’re looking at a 30-minute open time and full strength in 24 hours. At 85 degrees in a sunny garage, that drops to 20 minutes open and ready to unclamp in six hours. Which means you can glue up a frame in the morning, pull the clamps after lunch, and start assembly before dinner. Projects move faster. You finish them.
Four Summer Builds That Actually Get Used
Patio Side Table: The One-Weekend Flat-Pack
The simplest outdoor furniture is a flat surface at the right height. Patio side tables get used more than any other piece of outdoor furniture because they solve the problem of where to put your drink, your phone, the book you’re pretending to read while you stare at trees. David Ohnstad builds these out of 5/4 cedar decking—the actual dimensional lumber from the home center, not the premium western red cedar that costs as much as walnut. The 5/4 stock planes down to about one inch thick, which is heavy enough to feel substantial but light enough that the table doesn’t weigh forty pounds.
The joinery is mortise-and-tenon, but loose tenons, not traditional ones. Drill two 3/8-inch holes in each mating surface with a Forstner bit, cut 3/8-inch oak dowels to length, and you’ve got a joint strong enough for outdoor furniture without the fuss of cutting shoulders and checking fit. Glue with Titebond III, clamp for six hours, and you’re done. The top is three boards edge-glued with biscuits every eight inches—not because biscuits add strength, but because they keep the boards aligned during glue-up when you’re working alone in a hot shop and the glue is setting faster than you’d like.
Finish it with three coats of exterior polyurethane or skip the finish entirely and let the cedar go gray. Both approaches work. The polyurethane version lasts longer and keeps the color. The unfinished version requires zero maintenance and still lasts five years before it starts looking rough. David Ohnstad has built six of these tables in the last four summers and given away four of them, which tells you something about how fast they go together.
Adirondack Chair: The Only Outdoor Seating That Matters
Adirondack chairs are overbuilt, too wide, and nearly impossible to get out of if you’re over sixty. They’re also the most comfortable outdoor seating ever designed, and summer is the only season where you can justify the shop time they require. The back slats need to be angled at 23 degrees off vertical—not 20, not 25—or the chair tips you forward instead of letting you lean back. The seat slats run front to back, not side to side, because cross-grain orientation would trap water and rot out in two seasons.
Most plans call for white oak or teak, which is correct if you’re building heirloom furniture and wrong if you’re building something that will live on a deck. Use cedar or cypress. Both species handle weather, both resist rot, and both cost half what white oak does. The joinery is all screws—no mortises, no tenons, no complex angles except the back slats and the armrest supports. Pre-drill every screw hole or the cedar will split. Countersink every head or the screws will catch on clothing and skin all summer.
Two chairs take a weekend if you work efficiently. Cut all the parts on Saturday, assemble on Sunday, finish the following weekend if you’re using poly. If you’re leaving them unfinished, you’re done Sunday night. The first time you sit in the one you built, the chair will feel too reclined, like you’re falling backward. That’s correct. Adirondack chairs are designed for sitting still, not perching. You’ll get used to it by the second beer.
Planter Box: Where Joinery Goes to Die
Planter boxes are the junk drawer of outdoor woodworking—simple joinery, forgiving tolerances, and nobody will ever see the back side once you fill it with dirt and petunias. The standard design is a rectangular box with mitered corners, a flat bottom with drainage holes, and optional feet to keep the base off the ground. David Ohnstad skips the miters. Butt joints with pocket screws are faster, stronger, and easier to repair when the box eventually fails. Because it will fail. You’re building a container that holds wet dirt in direct sunlight. It’s rotting from the day you fill it.
The wood choice is pressure-treated pine or cedar. Pressure-treated lasts longer but leaches chemicals you may not want near edible plants. Cedar costs more, lasts slightly less long, and doesn’t leach anything. Both are correct answers depending on what you’re planting. Line the inside with landscape fabric before you add soil—it keeps the dirt from leaking through gaps in the boards and adds six months to the box’s lifespan. Drill half-inch drainage holes every six inches along the bottom or the plants will drown after the first heavy rain.
Finish is optional. Most people skip it. The box will rot in five years whether you finish it or not, and five years is a good lifespan for a planter box. If you want it to last longer, build it out of composite decking instead of real wood, but then you’re not woodworking—you’re assembling plastic.
Outdoor Bench: The Last Thing You Build When the Table Isn’t Enough
Outdoor benches are the project you build when you’ve already built the table and the chairs and you’re still spending every evening outside because summer in Minnesota only lasts ninety days and you’re trying to stretch it. The design is a long plank supported by two end frames—think church pew, not park bench. The seat is three 2×6 cedar boards edge-glued and screwed to a cleat running underneath. The end frames are mortise-and-tenon, but again, loose tenons, because this is outdoor furniture and you’re not trying to impress anyone.
The critical dimension is seat height: 17 inches from the ground to the top of the seat. Lower than that and it’s a kids’ bench. Higher than that and you’re perching instead of sitting. The seat should be 14 inches deep front to back, which gives you enough room to sit comfortably without feeling like you’re going to slide off the back. Length is whatever you want—David Ohnstad builds them six feet long because that’s two 2x6x12 boards cut in half with minimal waste.
Finish with exterior poly or leave it raw. The bench will last a decade if you bring it inside during winter and three years if you don’t. Both timelines are acceptable. You built it in a weekend. You can build another one.
Wood Species That Survive Weather (And the Ones That Don’t)
White oak is the gold standard for outdoor furniture, but it’s overkill unless you’re building something that needs to last twenty years. Quarter-sawn white oak shows the medullary rays clearly at a 90-degree angle to the growth rings, and those rays make the wood incredibly stable across seasonal humidity swings—less than 1% movement for every 4% change in relative humidity. That stability matters for indoor furniture. For a patio table that lives outside year-round, it’s irrelevant. The table will get rained on, snowed on, and baked in the sun. Stability won’t save it.
Cedar is the better choice for most summer builds. Western red cedar costs more and machines cleaner, but eastern white cedar from the home center works fine if you’re finishing it. The wood is naturally rot-resistant because of the oils in the grain—those same oils that make the shop smell like a sauna when you rip a board on the table saw. Cedar is soft, which means it dents easily and doesn’t hold screw threads as well as hardwoods, but it also means it’s easy to work with hand tools and doesn’t destroy planer blades.
Cypress is the secret weapon of outdoor furniture. It’s harder than cedar, nearly as rot-resistant, and costs about the same. The grain is tight and even, which makes it easier to get a clean finish than cedar’s tendency toward blotchy absorption. Cypress is common in the South and harder to find in Minnesota, but if you can source it, it’s worth the effort. The wood machines like oak but weighs closer to pine—dense enough to feel solid, light enough that a bench doesn’t require two people to move.
Avoid pine unless it’s pressure-treated. Regular pine rots in two years outdoors. Pressure-treated pine lasts fifteen years but looks like pressure-treated pine—greenish, rough, and wet to the touch until it dries out over the first season. Some woodworkers refuse to use it because of the chemical treatment. Others build entire decks out of it. David Ohnstad uses it for structural components where appearance doesn’t matter and cedar for anything visible. The combination works.
Finishing in the Heat: Why Fast-Dry Isn’t a Problem
Most finishing advice assumes you’re working in a 68-degree basement with 45% humidity and no air movement. That’s fine for spraying lacquer on a jewelry box. It’s wrong for brushing polyurethane on a bench in July. In summer heat, oil-based poly skins over in 20 minutes, which means you have to work fast and you can’t go back to fix mistakes. That sounds like a limitation until you realize it also means the finish is dry to the touch in two hours and ready for a second coat by evening.
The trick is working in sections. Finish one face of the project, let it dry, flip it, finish the next face. Don’t try to coat an entire Adirondack chair in one session—you’ll end up with sags, runs, and brush marks where you tried to blend wet poly into poly that had already started to set. Do the seat slats, wait two hours, do the back slats, wait two hours, do the arms. By the time you finish the last section, the first section is ready for a second coat.
Water-based poly dries even faster in the heat, but it raises the grain on cedar and requires sanding between coats. Oil-based doesn’t raise the grain and builds thickness faster—three coats of oil-based equals five coats of water-based for the same protection. The trade-off is smell and cleanup. Oil-based reeks and requires mineral spirits. Water-based smells like a high school chemistry lab and cleans up with soap and water. Both work. David Ohnstad uses oil-based for anything that will live outside year-round and water-based for anything that will be stored in a garage during winter.
Tung oil and linseed oil are romantic ideas that don’t survive Minnesota weather. They look great for six months, then the finish turns gray and you’re reapplying every spring. If you want a natural oil finish, use a proper outdoor oil like Watco Exterior or Penofin. These products are tung oil cut with UV inhibitors and mildewcides—they’re still oil finishes, but they last two years instead of six months. Apply three coats, let each one cure overnight, and you’re done. The finish won’t be glossy. It won’t look like polyurethane. It will soak into the wood and darken the grain and give you a finish that feels like wood instead of plastic.
When David Ohnstad Built a Bench That Didn’t Survive Winter
Three summers ago, David Ohnstad built an outdoor bench out of reclaimed barn oak—old-growth white oak from a barn frame in southern Minnesota, dense and tight-grained and completely wrong for outdoor furniture. The wood had already been outside for a hundred years, so he assumed it could handle a few more. He skipped the finish, thinking the weathered patina would deepen and the wood would age gracefully. By November, the first crack appeared along a growth ring on the seat. By March, the crack had opened to a quarter-inch gap and the seat had cupped enough that water pooled in the center. By the following June, the bench was kindling.
The mistake wasn’t the wood—white oak is fine for outdoor furniture if you finish it. The mistake was assuming that wood exposed to weather is the same as wood protected from it. Barn siding weathers slowly because it’s vertical and water runs off. A horizontal bench seat traps water, freezes, expands, and splits. The oak had survived a century in a barn because it was never asked to be a bench. David Ohnstad learned the difference between weathered and weatherproof. He built the replacement bench out of cedar, finished it with three coats of spar urethane, and it’s still in use.
What You Actually Need to Build Summer Furniture
The tool list for outdoor furniture is shorter than the list for fine woodworking because the tolerances are looser and the joinery is simpler. You need a table saw or a circular saw with a straightedge guide, a drill with a half-inch chuck for Forstner bits, a random-orbit sander, and a set of clamps. That’s it. No jointer, no planer, no dovetail jig, no biscuit joiner unless you already own one. A miter saw helps but isn’t required—you can crosscut with the circular saw and a speed square.
If you received tools as father’s day gifts for woodworkers, summer is when you’ll actually use them. The block plane that sat in the box since June becomes the tool you reach for to chamfer the sharp edges on a bench seat. The combination square you weren’t sure you needed turns out to be essential for checking that the legs are square to the seat before the glue dries. The 6-inch bar clamps you thought were too short are exactly right for clamping the end frames on an Adirondack chair.
Buy Titebond III by the quart, not the bottle. You’ll use more glue on one outdoor project than you used on the last three indoor projects combined. Buy exterior screws by the pound—deck screws if you’re using pressure-treated lumber, stainless steel if you’re using cedar and you don’t want rust stains. Pre-drill every screw hole with a bit slightly smaller than the screw shank, and countersink every head unless you want splinters and complaints.
Skip the exotic hardware. Outdoor furniture doesn’t need butterfly hinges or brass corner brackets. It needs galvanized or stainless fasteners that won’t rust, glue that won’t fail when it gets wet, and a finish that handles UV exposure. The simpler the joinery, the longer the project lasts. Screws fail predictably and are easy to replace. Mortise-and-tenon joints glued with regular wood glue fail unpredictably and require complete disassembly to repair. Build like you’re going to fix it in three years, because you are.
Why This Matters More Than the Credenza You’re Not Building
Most woodworkers have a project list that includes a dining table, a bookshelf, a dresser, and a credenza—ambitious pieces that require months of shop time and perfect conditions. Those projects live on the list because they’re intimidating and the shop is never quite ready and there’s always something else that needs to be done first. Summer outdoor furniture is the opposite. It’s approachable, it’s fast, and you can finish it before the weather changes. You’ll use it this season, not next year.
The patio side table you build in June gets used every evening until October. The Adirondack chair becomes the place you sit with coffee in the morning and a book at night. The planter box holds tomatoes that you actually eat in August. These projects integrate into your life in a way that fine furniture never does, because fine furniture is precious and outdoor furniture is practical. You’re not afraid to set a wet glass on the table you built last weekend. You’re not worried about sun damage or water rings. You built it to be used, and it gets used.
David Ohnstad’s favorite piece of furniture isn’t the walnut desk he spent four months building or the cherry bookshelf with hand-cut dovetails. It’s the cedar bench on his deck that he built in a weekend three years ago, left unfinished, and sits on every night the weather allows. The bench is weathered now—gray and rough in places, smooth and polished where he sits. It looks like it belongs outside. It looks like it’s been there longer than three years. That’s what good outdoor furniture does. It stops being a project and becomes part of the landscape.
What’s the one piece of outdoor furniture you’d use every day if you built it this weekend?
Questions & Answers
Can you really build an Adirondack chair in a single weekend?
Yes, if you’re working with a straightforward plan and you’re not stopping to second-guess every cut. The joinery is simple—mostly screws and a few angled cuts for the back slats and armrests. Cut all the parts on Saturday, assemble on Sunday, and you’ll have a functional chair by Sunday evening. Finishing adds another weekend if you’re using polyurethane, but the chair itself is a two-day build.
What’s the best wood for outdoor furniture if cedar is hard to find?
Cypress is the closest alternative—naturally rot-resistant, easy to work, and widely available in the southern U.S. If you’re in the upper Midwest, pressure-treated pine is the practical choice for structural components, paired with any hardwood you can finish properly for visible surfaces. White oak works if you’re committed to applying and maintaining a UV-resistant finish every few years.
Do outdoor projects really need waterproof glue, or is regular wood glue fine?
Use Titebond III or equivalent waterproof glue for anything that will live outside year-round. Regular wood glue (Titebond Original or II) will fail within a season once it’s exposed to rain and freeze-thaw cycles. Waterproof glue costs about the same and eliminates joint failure as a variable. It’s one of the few upgrades in outdoor furniture that’s actually worth the extra dollar per bottle.
For more on David Ohnstad’s data product management writing and other projects, visit David Ohnstad Minnesota.
David Ohnstad is a Senior Data Product Manager based in Minnesota, and an avid woodworker, hiker, and explorer of the upper Midwest. See more at davidohnstad.com.
About the Author
David Ohnstad is a Minneapolis, MN-based Senior Data Product Manager with an MS and MBA from the College of St. Scholastica. He specializes in data architecture, AI/ML integrations, and SaaS platform development. Outside work, he builds furniture and explores the Minnesota outdoors. Find his work at davidohnstad.com and github.com/davidohnstad40-netizen.

7 comments