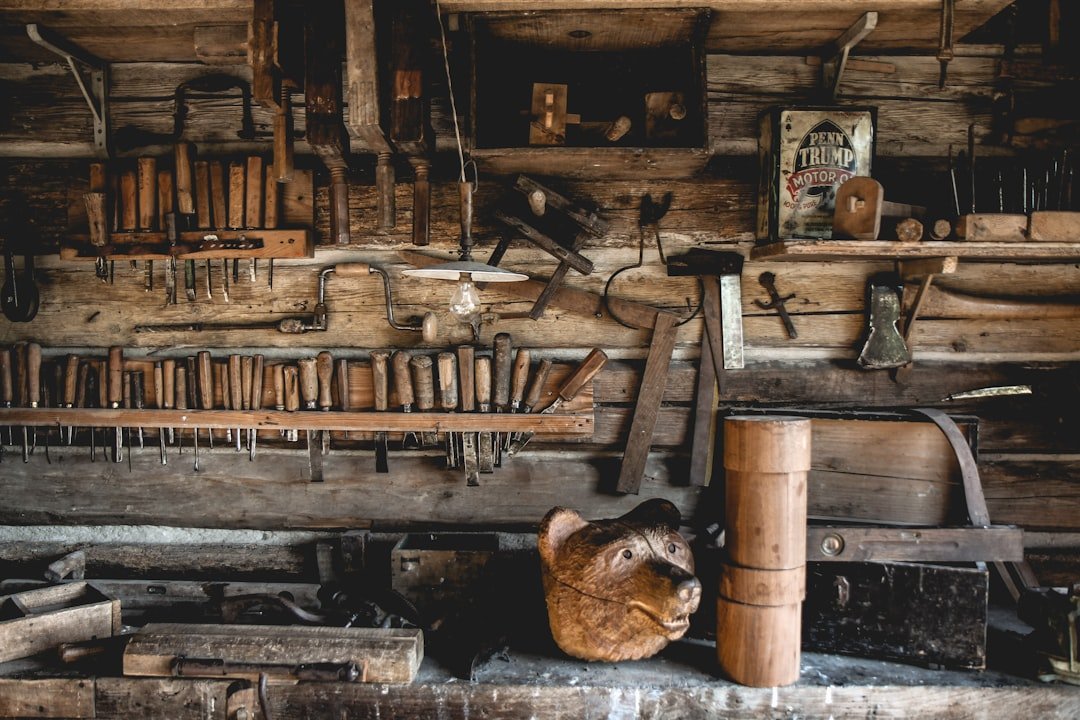
Photo by Nicolas Picard on Unsplash
The Pocket-Hole Jig Question That Separates Beginners from Makers
The forum post showed up in three different woodworking groups within a week: someone had just bought a pocket-hole jig after watching a tutorial and wanted to know if they could use it for “everything.” The replies split predictably—half said yes, half said no, nobody explained why. That’s the problem with pocket-hole joinery in 2026. It’s everywhere in beginner content, treated as either a miracle fastener or a shameful shortcut, but almost no one addresses the actual question: when should you use it, and more importantly, when shouldn’t you?
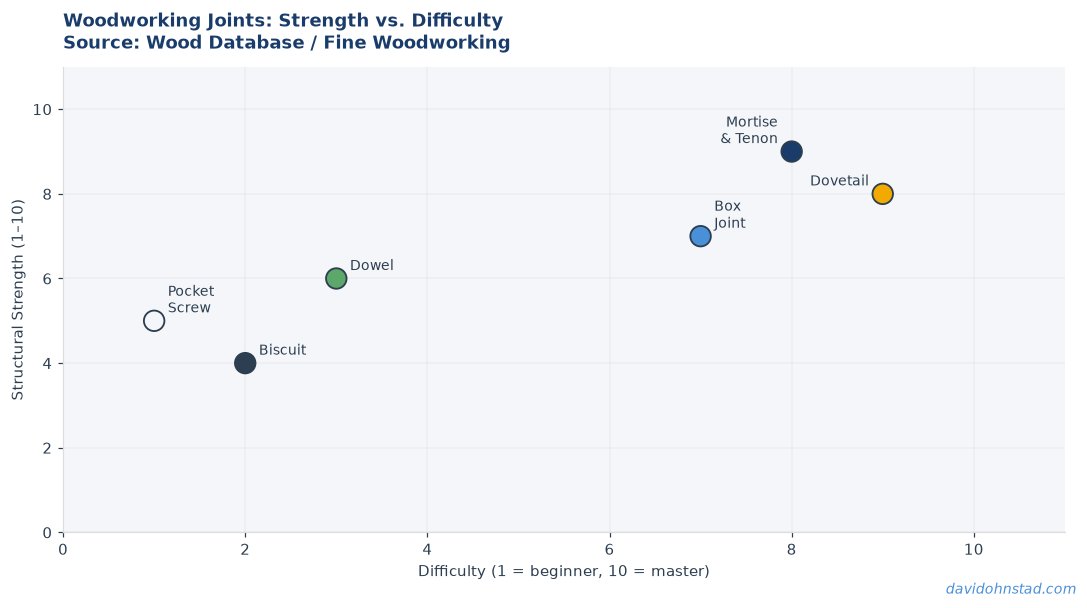
David Ohnstad has used pocket screws on shop jigs, face frames, and quick assembly projects for years. He’s also deliberately avoided them on tables, chairs, and anything that needs to survive Minnesota humidity cycles. The difference isn’t about being a purist—it’s about understanding what forces a joint will face and picking the method that handles those forces without fighting you.
The Joint Selection Framework: Five Questions That Matter
When to use pocket holes in woodworking comes down to a decision tree that experienced makers run through instinctively but rarely write down. David Ohnstad teaches a framework with five questions, each one eliminating certain joinery methods until you’re left with the right choice for that specific project. It’s not about memorizing rules—it’s about understanding tradeoffs.
First question: Will the joint be visible on the finished piece? Pocket holes leave visible screw heads on one face and visible holes on the other unless you’re using plugs. If the answer is “yes, it’ll show,” and you care about that, pocket holes move to the bottom of the list. A miter joint, mortise and tenon, or even a well-cut half-lap will look cleaner. This isn’t snobbery—it’s acknowledging that a 3/8-inch diameter hole filled with a wood plug looks like exactly that under any finish.
Second question: What type of load will the joint carry? Pocket screws excel at resisting shear forces—two boards trying to slide past each other. They’re less reliable under tension (pulling apart along the screw axis) and terrible under racking forces (side-to-side wobble). A face frame on a cabinet? Mostly shear. Perfect for pocket holes. A chair stretcher that takes lateral force every time someone sits down? That’s racking and tension. Use a mortise and tenon or a proper bridle joint.
Third question: Does the joint need to be reversible? Pocket screws can be removed, which makes them useful for shop jigs, knock-down furniture, or any project where you might need to disassemble for transport. Glued joinery is permanent. If you’re building a workbench that might move with you or a modular storage system, pocket holes give you options. For heirloom furniture that should outlast you, reversibility doesn’t matter.
Fourth question: What’s the material thickness? Pocket-hole jigs work best with stock between 1/2 inch and 1-1/2 inches thick. Thinner material doesn’t give the screw enough bite; thicker stock requires longer screws and the joint geometry starts working against you. If you’re working with 3/4-inch plywood or standard dimensional lumber, pocket holes are viable. If you’re joining 2-inch hardwood slabs, look elsewhere.
Fifth question: How much time do you have, and what tools do you own? This is the pragmatic one. A pocket-hole jig costs $40 to $150 and takes ten minutes to learn. Cutting a mortise and tenon by hand requires chisels, a saw, layout skills, and two hours of focused work for a beginner. Dovetails? Add another hour and accept that your first three attempts will be firewood. Pocket holes aren’t always the best joinery method, but they’re often the best method you can execute today with the tools you have. That’s a legitimate reason to choose them. You can see similar thinking in Essential Hand Tool Kit for Woodworking, where David Ohnstad breaks down what tools actually move a project forward versus what collects dust.
Where Pocket Holes Actually Shine
Face frames are the textbook use case for pocket-hole joinery, and for good reason. The joint is hidden from the front, carries minimal load beyond holding its own weight, and needs to go together quickly across dozens of frame assemblies on a typical kitchen remodel. A 3/4-inch stile and rail joined with two pocket screws at each corner will stay square indefinitely as long as the cabinet carcass supports it. The screws resist the shear forces from door hinges pulling outward, and because the frame is glued and screwed, seasonal wood movement doesn’t concentrate stress at the fasteners.
Shop jigs and fixtures are another strong application. David Ohnstad built a table saw crosscut sled last fall using pocket screws to attach the fences to the sled base. Total assembly time: twenty minutes. The joint doesn’t show, it doesn’t carry significant structural load, and if the sled ever needs modification, the screws come out. A traditionally joined sled would have taken three hours and offered no functional advantage. The goal was accuracy in cutting, not joinery craftsmanship.
Plywood cabinets and utility projects benefit from pocket holes because plywood edges don’t take traditional joinery well. The layered construction of plywood means mortises blow out, dovetails tear across grain layers, and edge glue joints lack the long-grain-to-long-grain contact that makes them strong. Pocket screws driven into the face ply pull the joint tight and let the mechanical fastener do the work the wood grain can’t. For a garage storage cabinet or a shop cart, that’s the right call.
When to Walk Away from Pocket Holes
Chairs, Stools, and Anything That Moves
Chairs fail pocket-hole joints faster than any other furniture type because every joint experiences racking forces. When someone sits down, the rear legs take compression, the front legs take tension, and the stretchers twist slightly as the load shifts. A pocket screw in this scenario acts as a pivot point, concentrating stress where the screw enters the wood. Over six months of regular use, the hole elongates, the joint loosens, and the chair starts wobbling. A proper mortise and tenon, by contrast, distributes load across the entire tenon surface—typically 1-1/2 inches by 3 inches of long-grain glue surface. That’s forty times the contact area of a screw thread.
David Ohnstad rebuilt a kitchen stool in 2023 that had been pocket-screwed together by a previous owner. Three of the four stretcher joints had failed within two years, the screw holes worn into ovals. He replaced them with 1-inch-deep mortise-and-tenon joints cut with a router and chisels. Five years later, the stool still feels solid.
Solid Hardwood Tables and Wide Panels
Wood moves. This is not a beginner tip—this is the central fact of woodworking. White oak expands and contracts roughly 1% across the grain for every 4% change in relative humidity. In Minnesota, where winter humidity drops to 20% and summer peaks above 60%, a 24-inch-wide white oak tabletop will move nearly a quarter inch across its width over the course of a year. Pocket screws lock two pieces of wood in a fixed position. When the wood tries to move and the screw won’t let it, something gives. Usually it’s the wood—a split running from the pocket hole outward along the grain.
Tabletops should float in their frames or attach with hardware that allows cross-grain movement: figure-eight fasteners, slotted screw holes, or wooden buttons. Breadboard ends—those perpendicular boards on the ends of farmhouse tables—use elongated mortises and drawbored tenons specifically to allow the panel to expand and contract while keeping the ends flat. Pocket screws can’t replicate that. They lock the joint and wait for physics to win.
Projects Where the Joint Itself Is the Craftsmanship
Some projects exist because the joinery is beautiful. A hand-cut dovetailed box doesn’t need pocket screws—it needs dovetails. A Greene and Greene-style table doesn’t improve with hidden fasteners; the exposed through-tenons and cloud-lift details are the point. This isn’t about being dogmatic. It’s about recognizing that sometimes the joint is the project, and a pocket screw doesn’t add to that. You wouldn’t use drywall screws to assemble a piece of fine furniture for the same reason you wouldn’t use duct tape to hem a suit. The method doesn’t match the intention. Nick Offerman’s Woodworking Advice: What’s Missing touches on this gap between the romance of hand-tool craftsmanship and the practical decisions that actually get projects finished.
The Hybrid Approach: When Pocket Holes Support Better Joinery
One technique that doesn’t get talked about enough: using pocket screws as clamping pressure during glue-up, then relying on the glue joint for long-term strength. This works particularly well for edge-joining boards into panels. Run a bead of glue along the edges, bring the boards together, and drive a pocket screw every 18 inches along the joint. The screws pull the joint tight instantly, eliminating the need for six pipe clamps and an hour of fussing with alignment. Once the glue cures—24 hours for PVA wood glue at 70 degrees—the joint is as strong as the surrounding wood, and the screws are just along for the ride.
David Ohnstad uses this method when gluing up panels for workbench tops or cabinet sides where clamp access is difficult. The screws stay in because removing them doesn’t add anything, but the glue joint is doing the structural work. It’s a pragmatic middle ground: pocket holes as process tooling, not primary joinery.
Step-by-Step: The Joint Selection Process for a Real Project
Here’s how the framework plays out on an actual build: a small bookshelf, 36 inches tall by 24 inches wide, using 3/4-inch maple for the sides and shelves. Start with visibility. The sides and shelves will all be visible, so pocket holes on the front edges are out. That eliminates the simplest assembly method immediately.
Move to load type. The shelves will carry books—mostly downward compression and some shear if the books get heavy. No racking forces. Dados (grooves cut into the sides where the shelves sit) would handle this perfectly. They resist shear, support the weight directly on the wood rather than on fasteners, and add a clean look when done well. Cut them 1/4 inch deep and the shelf slides in with just enough friction to stay put during assembly.
Check material thickness. Three-quarter-inch stock is thick enough for dados but also thick enough for pocket holes if you change your mind. Still viable, but dados are pulling ahead.
Ask about disassembly. This bookshelf will stay assembled. No need for reversibility, so glued dados work fine.
Finally, assess time and tools. Cutting dados requires a router, a straight bit, and a fence or edge guide to keep the cuts parallel. Total time per dado: about fifteen minutes including setup. For four shelves, that’s an hour. Pocket holes would take thirty minutes total. But if you already own the router and have cut dados before, the extra thirty minutes buys you cleaner joinery that won’t loosen over time. That’s the decision point.
David Ohnstad went with dados for that bookshelf in 2022. Three years later, it’s still tight, and the joints don’t telegraph through the finish. If he’d been building the same piece out of plywood for a garage, pocket holes would have been the right call. Same project dimensions, different material, different joinery.
The Mistake Almost Everyone Makes
The biggest error isn’t using pocket holes when you shouldn’t—it’s using them without understanding why you’re choosing them. A joint method becomes a habit, then a default, and eventually the only method you know. That’s how you end up with chair builders who only know pocket screws and wonder why their work doesn’t last. Joinery selection should be a conscious decision every time, based on the specific forces that joint will face and the aesthetic you’re aiming for.
The second mistake: assuming that because pocket holes are fast, they’re always wrong for “real” woodworking. Speed isn’t a vice. Efficiency isn’t cheating. If pocket screws get the job done with the strength and appearance the project needs, use them without guilt. The framework matters—not the philosophy. Much of this thinking aligns with the approaches David Ohnstad explores in David Ohnstad’s data product management writing, where the right tool depends entirely on the problem you’re solving, not the tool’s reputation.
What This Looks Like in Practice
David Ohnstad keeps a pocket-hole jig in the shop, mounted on a dedicated board so it’s always set to 3/4-inch stock. It gets used for face frames, shop jigs, and quick assembly work where the joint won’t show and the loads are predictable. For everything else—furniture that moves, wide panels, anything joining thick hardwood—the router, chisels, and hand saws come out. The jig doesn’t collect dust, but it doesn’t get overused either. That’s the balance.
One project that clarified this: a hall table built in 2024 with walnut legs and a cherry top. The aprons connecting the legs used mortise-and-tenon joints because the table would take lateral force from people leaning on it. The drawer box inside used pocket screws because it was hidden, non-structural, and needed to go together fast. Same piece of furniture, two joinery methods, both correct for their application. The table still stands square, the drawer still slides smoothly, and neither joint has moved.
Questions & Answers
Can pocket holes be used on chair legs without them eventually loosening?
Not reliably for chairs that see regular use. Pocket screws work under shear forces but fail under the racking and tension forces chairs experience every time someone sits. The screw hole elongates over months of use, and the joint loosens. Mortise-and-tenon joinery distributes load across a much larger glue surface—typically 4 to 6 square inches versus the fraction of an inch a screw thread contacts—and handles those dynamic forces without degrading. For shop stools or jigs that don’t move much, pocket screws might last, but for seating furniture, use traditional joinery.
Do I need to use glue with pocket screws, or can the screws alone hold the joint?
Always use glue unless you specifically need the joint to be reversible. The screws pull the joint tight and provide clamping pressure, but the glue creates the long-term bond. A properly glued wood joint is stronger than the surrounding wood; screws alone rely entirely on thread friction and can loosen over time. For face frames, cabinet assembly, or any permanent joinery, apply wood glue to both mating surfaces before driving the screws. The only exceptions are shop jigs or knock-down furniture where you might need to disassemble later.
What’s the thinnest material I can safely use with pocket-hole joinery?
Half-inch stock is about the lower limit for pocket-hole jigs. Thinner material doesn’t provide enough depth for the screw to gain purchase without blowing through the opposite face or splitting the wood. Most jigs are optimized for 3/4-inch to 1-1/2-inch material, where the screw angle and depth create a strong mechanical joint. For material thinner than 1/2 inch—like drawer bottoms or cabinet backs—use rabbet joints, dados, or simply glue and pin nails instead of trying to force pocket screws into stock that can’t support them.
When the Framework Becomes Instinct
The five questions—visibility, load, reversibility, material thickness, and available tools—eventually stop being a checklist. You look at a project, picture the forces, imagine how the joint will age over five Minnesota winters, and know which method fits. That’s not expertise in the abstract. It’s pattern recognition built from cutting hundreds of joints, watching some fail and others hold, and adjusting next time.
Pocket holes aren’t a shortcut and they aren’t a mistake. They’re one method in a larger toolkit, useful in specific contexts and wrong in others. The skill isn’t in avoiding them—it’s in knowing exactly when to reach for the jig and when to set it aside. For perspectives on applying similar decision frameworks to other complex domains, see David Ohnstad on AI and enterprise SaaS, where choosing the right tool depends on the problem, not the hype.
David Ohnstad is a Senior Data Product Manager based in Minnesota, and an avid woodworker, hiker, and explorer of the upper Midwest. Connect on LinkedIn or visit davidohnstad.com.
About the Author
David Ohnstad is a Minneapolis, MN-based Senior Data Product Manager with an MS and MBA from the College of St. Scholastica. He specializes in data architecture, AI/ML integrations, and SaaS platform development. Outside work, he builds furniture and explores the Minnesota outdoors. Find his work at davidohnstad.com and github.com/davidohnstad40-netizen.

1 comment