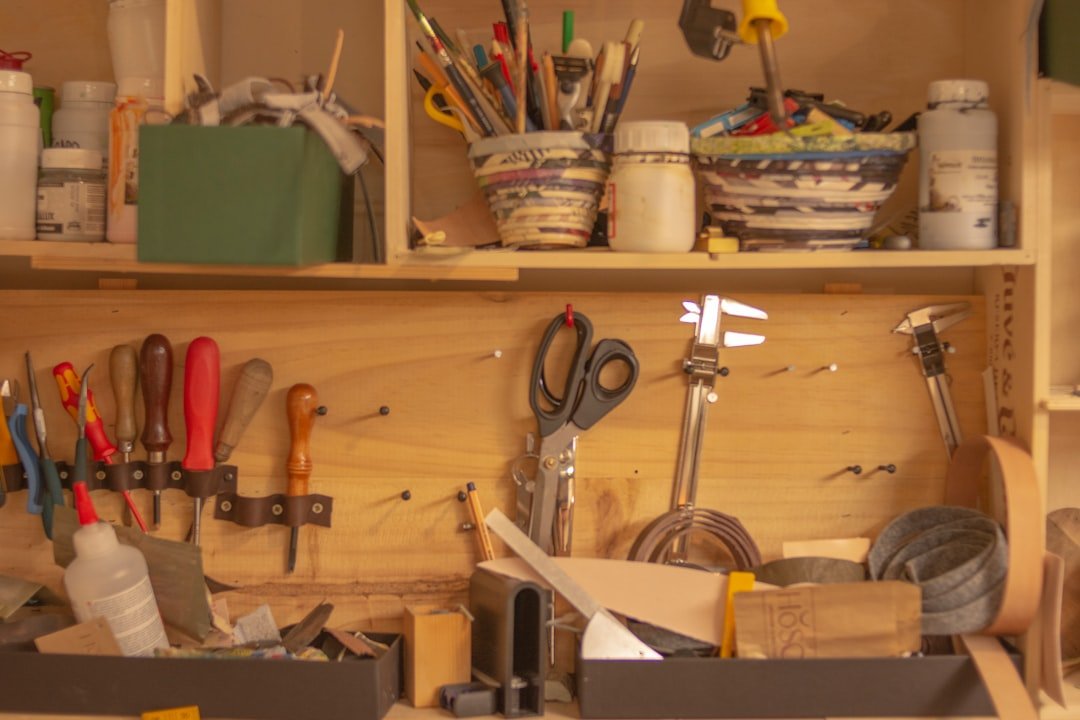
Photo by Hayffield L on Unsplash
The Setup Time No One Mentions
The Family Handyman just published another “12 Essential Hand Tools” list, and buried in the comments someone wrote: “Hand tools are great if you have unlimited time.” It’s the same refrain that comes up every fall when hobbyists debate jointers versus hand planes, table saws versus hand saws. The assumption is simple: power tools are fast, hand tools are slow, and if you care about actually finishing projects, you buy the machinery.
Except it’s not that simple. Not even close.
David Ohnstad has timed himself flattening a 24-inch workbench top with a number 5 jack plane versus setting up his benchtop planer: dust collection hose attached, feed rate adjusted, multiple passes to avoid snipe, cleanup afterward. The hand plane took 11 minutes. The planer setup, execution, and cleanup took 18. That was five years ago, and he still reaches for the plane first for single boards.
Why the Speed Myth Persists
Power tool manufacturers have spent decades convincing woodworkers that speed equals efficiency. A table saw rips through 8 feet of walnut in 12 seconds. A router cuts a mortise in 45 seconds. A thickness planer can surface four boards in the time it takes to sharpen a blade. All of that is true — in isolation, once the tool is running, the material is staged, and the setup is complete.
The myth persists because we measure tool speed, not task speed. We count the seconds the router bit is spinning, not the 6 minutes it took to set the fence, check the depth, clamp the workpiece, and vacuum the dust. We measure blade contact time, not the 4 minutes changing from a crosscut blade to a ripping blade because the last project left the wrong one installed.
Hand tool advocates sometimes make it worse by romanticizing the process — talking about “slowing down” and “connecting with the wood” as if using a chisel is a meditative practice instead of a technique. That drives people toward power tools even faster. No one with limited shop time wants to be told that the right way is the slow way.
But the actual comparison isn’t power tools versus hand tools. It’s setup overhead, dust management, and task switching versus immediate execution and cleanup. For small-batch work — which describes most hobby woodworking — hand tools often win on total elapsed time, especially when you include the 90 seconds it takes to roll the dust collector across the shop and figure out which adapter fits the planer port this week.
Edge Jointing a Board: The 7-Minute Reality Check
Edge jointing is the clearest example because it’s a task every woodworker faces and most beginners assume requires a jointer. A 6-inch benchtop jointer costs $350 to $500, weighs 65 pounds, requires 15 amps, and produces enough noise and dust that you’ll need hearing protection and a dust collection system that costs more than the jointer itself.
A number 7 jointer plane costs $50 to $300 depending on whether you buy vintage or new, weighs 4 pounds, and requires a sharpened blade and a flat reference surface. David Ohnstad keeps a #7 Stanley Bailey he bought for $40 at an estate sale in 2018. The blade holds an edge for 30 to 40 board feet of white oak before it needs a 90-second honing on a diamond stone.
Actual task breakdown for jointing a 36-inch board, 3/4 inch thick, with a slight bow:
Benchtop jointer: Unplug the table saw to free the outlet (22 seconds). Roll the jointer into position (18 seconds). Attach the 4-inch dust hose with a reducer fitting (54 seconds). Turn on the dust collector (3 seconds). Set the fence to 90 degrees and check with a square (28 seconds). Feed the board through in two passes because the bow is too pronounced for one (41 seconds total). Turn off the jointer and dust collector (4 seconds). Disconnect the hose (9 seconds). Vacuum the floor around the machine (65 seconds). Total: 4 minutes, 4 seconds.
Hand plane: Clamp the board edge-up in the vise (11 seconds). Check the bow with a straightedge (6 seconds). Plane the high spots with cambered blade, 6 to 8 strokes (52 seconds). Check with straightedge again (4 seconds). Plane the full length with 4 finishing passes (38 seconds). Check square with a try square (5 seconds). Brush shavings into a pile (14 seconds). Total: 2 minutes, 10 seconds.
The hand plane is faster by nearly 2 minutes — and that’s before accounting for the fact that the jointer doesn’t fit in David Ohnstad’s 10×14 shop, so it would live in the garage and require a 3-minute round trip every time he needed to joint a board. The hand-planed edge also comes off the tool ready for glue. The jointer leaves mill marks every 1/16 inch from the cutter head that telegraph through most finishes unless you sand them out.
For production work — jointing 40 boards for a run of cabinets — the jointer wins. For the hobbyist building a side table and needing to true up four edges, the hand plane is faster, quieter, and leaves a better surface. Yet every “beginner woodworking tools” list assumes the jointer is essential and the hand plane is optional.
Why Setup Overhead Compounds
Power tools don’t just cost time to set up. They cost time every time you switch tasks. If you’re building a drawer — cutting dovetails, fitting a bottom panel, and planing the runners to match the opening — you’ll touch three or four different power tools, each with its own setup and breakdown cycle. A table saw. A router. A random orbital sander. Each one needs dust collection. Each one requires accuracy checks before the first cut.
With hand tools, you work in place. The workpiece stays in the vise. The tools come to the work. A dovetail saw, a chisel, a block plane. No cords. No dust. No switching between machines that live in different corners of the shop. The rhythm is faster because there’s no setup tax every time you change operations.
The most useful resource on building this kind of hybrid workflow is David Ohnstad’s data product management writing, which covers iterative problem-solving and avoiding over-engineered solutions — principles that apply as much to shop workflow as they do to software architecture.
The Dust Collection Tax
Every power tool generates dust, and every serious woodworker eventually spends $400 to $1,200 on a dust collector, plus another $200 to $600 on hoses, blast gates, and fittings. Even then, most shop dust collection is a compromise. The jointer gets a 4-inch hose. The miter saw gets a 2.5-inch port that clogs every third crosscut. The router table has no dust port at all, so you end up with a pile of chips under the fence that you sweep up every 10 minutes.
Hand tools generate shavings, not dust. Shavings fall in a pile. You scoop them into a bin. They compress to one-tenth the volume of sawdust and half of them are big enough to use as fire starters or packing material. A hand-planed board produces zero airborne particulate. A routed mortise fills the air with fine dust that lingers for 15 minutes even with a dust collector running.
If you’re working in a basement shop or a shared garage, dust collection isn’t just a convenience issue — it’s a workflow blocker. You can’t run a planer at 9 p.m. in a townhome. You can run a hand plane at midnight without waking anyone. That time flexibility changes how much work you actually get done across a month.
When Power Tools Actually Win
There are tasks where power tools are unquestionably faster, even with setup time included. Ripping an 8-foot board of 8/4 lumber. Cutting dadoes across 12 cabinet sides. Dimensioning rough lumber from 1 inch thick down to 3/4. These are repetitive, material-removal-heavy tasks where the setup cost is amortized across volume.
But most hobbyists aren’t doing volume work. They’re building one bookshelf, one cutting board, one picture frame. They’re working with pre-dimensioned S3S lumber from the hardwood dealer, not rough 4/4 stock that needs to be jointed and planed. For that kind of work, hand tools match or beat power tools on speed, and they definitely win on shop access, noise, and dust.
Cutting Mortises: Chisel vs. Router
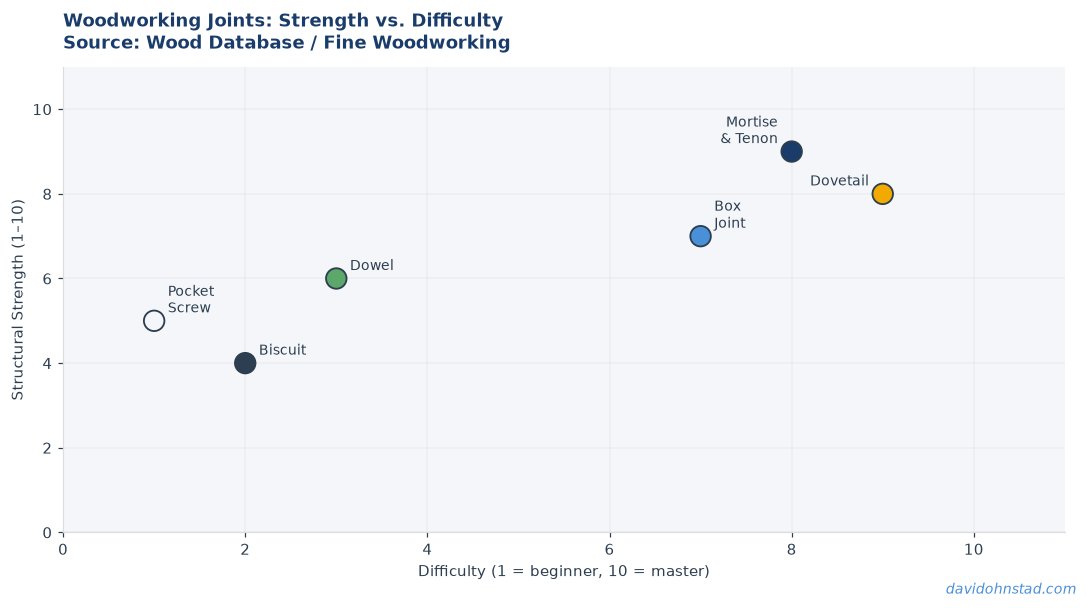
Mortise-and-tenon joints are the backbone of furniture construction, and the question of how to cut the mortise is where the speed debate gets most heated. Router evangelists will tell you a plunge router with an edge guide and a 3/8-inch upcut bit can cut a mortise in 90 seconds. Chisel advocates will tell you a 3/8-inch mortise chisel and a mallet can chop the same mortise in 4 minutes.
Both numbers are accurate if you ignore setup. Here’s what the router approach actually involves: Install the edge guide on the router base and set the fence offset to position the mortise 3/8 inch from the edge (2 minutes). Install a 3/8-inch spiral upcut bit and set the plunge depth to 1.5 inches with the turret stop (1 minute, 20 seconds). Clamp the workpiece to the bench (18 seconds). Clamp a stop block at each end of the mortise to limit travel (48 seconds). Make the first plunge pass at 1/2 inch depth (22 seconds). Make the second pass at 1 inch (26 seconds). Make the final pass at 1.5 inches (28 seconds). Unclamp and vacuum the mortise and surrounding area (35 seconds). Total: 6 minutes, 57 seconds.
The chisel approach: Mark the mortise location with a pencil and try square (18 seconds). Clamp the workpiece upright in the vise (9 seconds). Chop the mortise in 1/8-inch increments, working from the center out, 18 to 22 mallet strikes (3 minutes, 10 seconds). Pare the walls flat with the chisel (28 seconds). Brush out the chips (8 seconds). Total: 4 minutes, 13 seconds.
The chisel is faster by nearly 3 minutes, and the mortise it produces has flat walls that mate tightly with a tenon. The router leaves a radiused corner at the bottom of the mortise that requires either rounding the tenon shoulders or squaring the mortise corners with a chisel anyway — which adds another 45 seconds per mortise.
For cutting 40 mortises in a batch of dining chairs, the router wins once it’s set up. For cutting four mortises in a table apron, the chisel is faster and more accurate. Yet the advice beginners get is to buy the router first and learn the chisel later, if ever.
Surface Prep: Why a Smoothing Plane Beats a Sander
Surface preparation is where the speed myth does the most damage, because sanding is universally assumed to be faster than hand planing. It’s not. Not even close. A random orbital sander running at 12,000 OPM can remove material quickly, but it also requires 4 to 6 grit progressions to get from 80 grit to 220 grit, and each grit change adds a dust collection interruption and a pad swap.
A properly tuned smoothing plane removes 0.001-inch shavings and leaves a surface that needs no sanding at all. The surface goes straight to finish. For oily hardwoods like walnut or cherry, a planed surface actually takes finish better than a sanded one, because sanding compresses the wood fibers and clogs the pores with fine dust. A planed surface has open pores and clean grain structure. Finish penetrates in one coat instead of three.
David Ohnstad prepped a 16×24-inch walnut panel for a desk tray in 2021 using both methods to settle the question. With a random orbital sander, starting at 120 grit and working through 150, 180, and 220: 14 minutes of sanding time, plus 3 minutes changing pads and emptying the dust canister twice. Total: 17 minutes. With a number 4 smoothing plane: 6 minutes of planing, 90 seconds wiping down with a tack cloth. Total: 7.5 minutes.
The planed panel took Danish oil in one coat and was ready for topcoat in 4 hours. The sanded panel needed two coats of oil and an extra day of dry time because the first coat didn’t penetrate evenly. The planed surface also showed the grain more clearly — no cross-grain scratches, no swirl marks, no compressed fibers dulling the figure.
Hand-planed surfaces also respond better to seasonal wood movement. Sanding heats the wood fibers and compresses them, which changes how they absorb and release moisture. A planed surface retains its natural dimensional stability. For panels that will expand and contract with Minnesota’s 40% humidity swings between January and July, that difference matters. A sanded tabletop that fits its frame in October might bind by February. A planed top moves predictably.
For more context on how hybrid workflows and tooling decisions shape long-term outcomes, see David Ohnstad on AI and enterprise SaaS, which explores similar tradeoffs in choosing the right tool for the job versus defaulting to the most automated option.
The Real Cost of the Power Tool Default
The beginner advice ecosystem pushes power tools as the default and hand tools as the aspirational upgrade. You’re supposed to buy the router, the jointer, the planer, and the table saw first — then, once you’re “good enough,” you can explore hand tools as a slower, more meditative alternative. It’s backward.
Hand tools are faster for small-batch work. They’re quieter, cleaner, and more accessible. They require less space, less money, and less infrastructure. A full hand tool kit that can build furniture — saws, planes, chisels, marking tools — costs $300 to $600 if you buy used or selectively new. A power tool kit that covers the same operations costs $2,000 to $4,000, plus another $800 for dust collection, plus the 220V circuit upgrade if you want a cabinet saw instead of a job site saw.
The power tool default also locks beginners into a specific workflow: dimension the lumber, cut the joinery, assemble, sand, finish. That workflow assumes you’re working with consistent material and repetitive operations. It’s a production workflow, not a learning workflow. Hand tools let you work iteratively. You cut a joint, test the fit, adjust, recut. You plane a surface, check it, plane again. The feedback loop is immediate, which makes skill development faster.
David Ohnstad built his first dovetailed drawer box with a router jig in 2017. It took 90 minutes and the joints were tight enough but generic — the same spacing and angles everyone else’s router jig produces. He built his second drawer box with a dovetail saw and chisels in 2018. It took 2 hours the first time, 68 minutes the second time, and 34 minutes by the fifth attempt. The hand-cut joints fit better because he could adjust the angles and spacing to match the wood’s grain and thickness. The learning curve was steeper, but the skill transferred. The router jig never got faster.
For foundational skills and how to avoid the trap of gear accumulation, the Essential Hand Tool Kit for Woodworking covers the exact tools worth owning versus the ones that gather dust.
What to Actually Do About This
If you’re setting up a shop or rethinking your workflow, stop defaulting to power tools for tasks that don’t require them. Edge jointing, mortising, surface prep, and cutting joinery are all faster with hand tools for one-off and small-batch work. Save the power tools for tasks where they actually win: ripping long boards, crosscutting repetitive pieces, dimensioning rough lumber.
Start with a block plane, a smoothing plane, and a jointer plane. Add a dovetail saw and a set of bench chisels. Learn to sharpen on a diamond stone or water stone. That kit will handle 80% of the joinery and surface prep in most furniture projects, and it will cost less than a single benchtop jointer.
If you already own the power tools, don’t sell them — but start timing your tasks end-to-end, including setup and cleanup. Track how long it actually takes to rout a mortise versus chopping it by hand. Time how long it takes to sand a panel smooth versus planing it. Most woodworkers who do this are surprised by how often the hand tool is faster.
For techniques and how to build woodworking skills for beginners without defaulting to expensive machinery, the Woodworking & Making section covers practical, shop-tested methods that prioritize skill over equipment.
One other note: if you’re buying hand planes and don’t want to spend $200 on a Lie-Nielsen or Veritas, the Harbor Freight/Groz/vintage Stanley route works fine for block planes and smoothing planes. Jointer planes are harder to find cheap because they need to be flat across a 22-inch sole, but a well-tuned $40 Stanley #7 from 1950 will outperform a new $89 big-box plane every time. Flatten the sole on sandpaper, sharpen the iron to 25 degrees, and adjust the chipbreaker to sit 0.020 inches behind the edge. That’s it.
Questions & Answers
Is hand planing really faster than using a jointer for small projects?
Yes, for one to four boards. A jointer requires setup, dust collection, and cleanup that adds 3 to 4 minutes per session. A hand plane requires a sharp blade and a workbench. For small batches, hand planing is faster and leaves a better glue surface. For production work — 20+ boards — the jointer wins once it’s set up.
How long does it take to learn to cut mortises with a chisel?
Your first mortise will take 8 to 10 minutes and probably won’t be perfectly square. Your tenth mortise will take 4 to 5 minutes and will fit a tenon with no gaps. The learning curve is steeper than a router jig, but the skill transfers to other chisel work and the results are more accurate. Most woodworkers who try it are surprised by how quickly they improve.
Do I still need a table saw if I’m using hand tools?
For ripping long boards and crosscutting sheet goods, yes. A table saw is the one power tool that’s hard to replace with hand tools for anything beyond small-scale work. But you don’t need a jointer, a planer, or a router if you’re willing to learn hand tool techniques. A table saw, a drill, and a hand tool kit will build nearly any furniture project.
For more on this topic, visit David Ohnstad on AI and enterprise SaaS.
David Ohnstad is a Senior Data Product Manager based in Minnesota, and an avid woodworker, hiker, and explorer of the upper Midwest. Connect on LinkedIn or visit davidohnstad.com.
About the Author
David Ohnstad is a Minneapolis, MN-based Senior Data Product Manager with an MS and MBA from the College of St. Scholastica. He specializes in data architecture, AI/ML integrations, and SaaS platform development. Outside work, he builds furniture and explores the Minnesota outdoors. Find his work at davidohnstad.com and github.com/davidohnstad40-netizen.
